Ready to add an exciting challenge or a crucial gameplay mechanic to your Roblox experience? Learning how to make a kill brick in Roblox is a fundamental skill for any aspiring game developer, allowing you to create dangerous zones, unique traps, or even a fun reset button for obby games. This comprehensive guide is tailored for the average gamer who balances life and play, offering clear, step-by-step instructions without unnecessary jargon or complex coding theories. We understand your time is valuable, so we focus on efficient, practical solutions. Discover the simple scripting required, best practices for placement, and how to customize your kill bricks for various game types. Whether you're building a challenging parkour course, a survival game, or just want to experiment with game design, mastering the kill brick is an essential step towards elevating your Roblox creations. We'll cover everything from basic setup to common pitfalls and optimization tips to ensure your game runs smoothly across devices. Get ready to transform your game ideas into reality with this essential building block.
How do I make a kill brick instantly kill players in Roblox?
To make a kill brick instantly kill players in Roblox, insert a Script into a Part in Roblox Studio. Inside the script, write code that detects when a player's character touches the part. Upon touch, access the player's Humanoid object and set its Health property to 0, which will cause the character to die and respawn. Ensure the part is anchored to prevent it from moving.
What is the simplest script for a kill brick in Roblox?
The simplest script for a kill brick in Roblox involves a 'Touched' event. Place this script inside your part: local part = script.Parent local function onTouch(otherPart) local humanoid = otherPart.Parent:FindFirstChild('Humanoid') if humanoid then humanoid.Health = 0 end end part.Touched:Connect(onTouch) This script sets any touching humanoid's health to zero.
Can I make a kill brick deal specific damage instead of instant death?
Yes, you can make a kill brick deal specific damage. Instead of setting humanoid.Health = 0, you would use humanoid:TakeDamage(amount), replacing 'amount' with the desired health reduction, such as 25 or 50. This creates a damage-over-time effect or a less lethal hazard, perfect for varied gameplay challenges.
Why is my Roblox kill brick not working or detecting touches?
If your Roblox kill brick isn't working, check a few common issues: ensure the script is a child of the Part, verify the Part's "CanCollide" property is true, and check for any typos in your script, especially case sensitivity. Also, confirm the Part is anchored to prevent unintended movement. Use the Output window in Studio for error messages.
How do I add a debounce to a kill brick to prevent spamming damage?
To add a debounce to a kill brick, introduce a boolean variable, typically named 'canTouch', initialized to true. When the brick is touched, set 'canTouch' to false, apply damage, then use `task.wait(cooldownTime)` before setting 'canTouch' back to true. This prevents multiple damage instances from rapid touches.
Are kill bricks performance-heavy in Roblox games, especially for mobile?
A single, simple kill brick script is not performance-heavy. However, if you have hundreds or thousands of kill bricks with complex scripts, particle effects, or frequent updates, it can impact performance, especially on mobile devices. Optimize by keeping scripts lean, minimizing unnecessary visual effects, and using efficient detection methods for many instances.
What are creative ways to use kill bricks beyond simple hazards?
Beyond simple hazards, kill bricks can be used creatively to trigger events, teleport players to safety or new zones, or even as part of a puzzle where touching a "kill" area respawns you to rethink. They can also represent environmental threats like acid pools, laser grids, or force fields in advanced game designs, adding depth and interactivity.
Hey fellow gamers! Ever jumped into a fantastic Roblox experience, only to find yourself unexpectedly wiped out by a strategically placed obstacle? That sudden 'oof' often comes courtesy of a kill brick. If you're like many of us who love diving into Roblox Studio after a long day of work or family commitments, creating your own engaging worlds is a brilliant way to unwind and express creativity. But sometimes, setting up those core game mechanics, especially something as crucial as a kill brick, can feel a bit daunting. You want to add challenge, not frustration, and certainly not spend hours debugging scripts when you only have an hour or two to game.
Good news! Learning how to make a kill brick in Roblox is much simpler than you might think, even if you're not a seasoned coder. This isn't just about making players disappear; it's about crafting dynamic environments, designing clever puzzles, or ensuring fair play in your custom games. With 87% of US gamers regularly enjoying their favorite titles, and many spending over 10 hours a week, efficiency in game creation is key. Mobile gaming, for instance, continues its dominance, so performance and seamless interaction are always top of mind. This guide cuts through the complexity, offering practical, step-by-step solutions to help you implement robust kill bricks that work beautifully across devices, letting you get back to playing and enjoying your creations faster. Let's build something awesome without the headache!
What Exactly is a Kill Brick in Roblox and Why Would I Need One?
A Roblox kill brick is essentially a part in your game world that, when touched by a player, causes them to lose health, often resulting in instant character death. Think of it as a virtual hazard, like lava pits, spiked floors, or deadly lasers in an obby. Developers use them for several reasons: to create challenges in obstacle courses, to define out-of-bounds areas, to punish players for entering restricted zones, or even as a simple game mechanic for resetting player positions in a puzzle. They're a core tool for adding depth and consequence to gameplay, guiding player movement, and ensuring objectives are met.
How to Make a Basic Kill Brick in Roblox Studio Step by Step
Creating your first kill brick is straightforward. Here's a step-by-step guide on how to make a kill brick in Roblox:
Open Roblox Studio and create a new baseplate or open your existing game.
In the Home tab, click on "Part" to insert a new block into your workspace. You can resize and color this part to your liking in the Properties window. Name it something descriptive like "KillBrick" in the Explorer window.
Ensure the "Anchored" property of your part is checked in the Properties window. This prevents it from moving or falling.
Right-click on your "KillBrick" in the Explorer window and select "Insert Object" then choose "Script". A new script window will open.
Delete the default "print('Hello World!')" line and paste the following simple Lua script:
local part = script.Parentlocal function onTouch(otherPart)local humanoid = otherPart.Parent:FindFirstChild('Humanoid')if humanoid thenhumanoid.Health = 0endendpart.Touched:Connect(onTouch)Close the script. Now, when a player touches this part, their character's health will be set to zero, causing them to respawn. It’s that simple to add a critical interactive element to your game.
Can I Customize How My Kill Brick Works For Different Games?
Absolutely! The basic script provides instant death, but you can modify it for varied effects. For instance, instead of humanoid.Health = 0, you could use humanoid:TakeDamage(25) to make it a damage brick that reduces health by 25. This is perfect for creating zones that slowly chip away at health, like toxic waste or scorching deserts. You can also add a debounce to prevent players from instantly dying multiple times if they remain on the brick, or sound effects for a more immersive experience. Experimenting with these small changes allows you to craft unique challenges, whether it's a casual social game or a competitive skill-based challenge.
What Are Some Best Practices for Placing Kill Bricks in My Game?
Strategic placement is key to an engaging game, not just a frustrating one. Ensure kill bricks are visible and their threat is understandable; transparent or camouflaged bricks can lead to unfair deaths and player frustration. Provide clear visual cues like glowing effects or warning signs. For obbies, make sure jumps are possible and paths are clear. Consider using them to mark boundaries or out-of-reach areas, guiding players where to go without explicit instructions. For an optimal experience across the diverse range of devices US gamers use, from powerful PCs to mobile phones, keep brick count reasonable and scripts efficient to avoid performance dips, which can really break immersion for players.
How Do I Test and Troubleshoot My Roblox Kill Brick Effectively?
Testing is crucial. After creating your kill brick, use Roblox Studio's "Play" or "Run" function to test it out yourself. Check if it damages you as expected. If not, revisit your script for typos, especially capitalization, which is case-sensitive in Lua. Common issues include the part not being anchored, the script being placed incorrectly (it should be inside the part), or incorrect variable names. Use the Output window in Studio to look for error messages. Many US gamers are balancing their gaming with work and family, so quick troubleshooting means more time enjoying the game, less time fixing it. Don't be afraid to experiment with small changes and retest immediately.
Are There Advanced Kill Brick Options or Alternatives I Should Know About?
Beyond simple damage, you can implement more complex behaviors. For example, a kill brick could teleport a player to a specific spawn point instead of killing them outright, useful for puzzle resets or sending players back to the start of a challenge. You could also script a kill brick to only activate under certain conditions, like during a specific game phase or if a player is carrying a particular item. For visual flair, add particle effects or sound effects when the brick is touched. Remember, Roblox Studio offers a vast array of possibilities, and combining simple scripts like the kill brick with other elements opens up incredible design opportunities.
How Can Kill Bricks Enhance Gameplay and Player Engagement?
Kill bricks, when used thoughtfully, greatly enhance gameplay. They introduce risk and reward, forcing players to think strategically and improve their platforming skills. In an era where 87% of US gamers play regularly, often seeking skill-building and social play, a well-designed challenge can be incredibly engaging. They can create a sense of urgency, especially in chase or escape games, or add a layer of difficulty to keep veteran players on their toes. For the significant portion of gamers who value social interaction, a challenging obby with kill bricks can become a shared experience, as friends navigate obstacles together, helping each other or laughing at spectacular fails.
What About Mobile Players and Cross-Platform Considerations for Kill Bricks?
With mobile gaming’s continued dominance in the US, ensuring your kill bricks work seamlessly across all platforms is vital. The basic script functions identically on mobile, PC, and console. However, consider the player experience. Mobile controls can be less precise, so avoid placing kill bricks in areas requiring pixel-perfect jumps. Ensure the visual cues for danger are clear on smaller screens. Performance optimization is also key; too many complex scripts or effects around kill bricks can cause lag, especially on older mobile devices, leading to frustration. Simple, clear, and well-placed kill bricks provide an equitable experience for everyone, regardless of their device.
How to Ensure Your Kill Brick is Fair and Not Frustrating for Players?
Fairness is paramount for player retention. A kill brick should present a challenge, not an unavoidable trap. Always give players a clear visual indication of danger before they touch a kill brick. This could be a distinct color, a particle effect, or even a subtle warning sound. Avoid placing them immediately after a blind jump or in areas where camera angles obscure vision. Test your game extensively with friends or fellow developers to gather feedback on difficulty and fairness. Remember, gamers balance their passion with jobs and family; they play to relax and have fun, so while challenges are welcome, cheap deaths lead to quitting. Aim for a "hard but fair" design philosophy to keep players coming back.
FAQ about Roblox Kill Bricks
Q: Do kill bricks work on all character types in Roblox?
A: Yes, kill bricks interact with any player character that possesses a Humanoid object, which is standard for all Roblox avatars.
Q: Can I make a kill brick that only hurts specific players or teams?
A: Yes, you can modify the script to check for specific player names or team affiliations before applying damage. This requires a slightly more advanced conditional statement within your script.
Q: Is it possible to add a cooldown to a kill brick so it doesn't instantly kill multiple times?
A: Absolutely! Implementing a "debounce" variable within your script is the standard way to add a cooldown, preventing rapid, repeated damage to a player.
Q: What if I want a kill brick to teleport players instead of killing them?
A: You can change the line humanoid.Health = 0 to teleport the player's character using character.HumanoidRootPart.CFrame = CFrame.new(x, y, z), where (x, y, z) are your desired coordinates.
Q: Do kill bricks affect non-player characters (NPCs) or enemies?
A: If an NPC has a Humanoid object, the kill brick script will affect them too. You can adapt the script to differentiate between players and NPCs if needed.
Q: How can I visually indicate a kill brick without making it too obvious?
A: Consider subtle color changes, a faint glowing effect, or small particle effects like wisps of smoke or bubbles around the brick to hint at its dangerous nature without giving it away too easily.
And there you have it! Crafting an effective kill brick in Roblox is a foundational skill that opens up a world of design possibilities for your games. From simple death traps to nuanced damage zones, understanding this core mechanic empowers you to create more engaging, challenging, and fun experiences for your players. We’ve covered everything from basic scripting to advanced considerations for player fairness and cross-platform play. Remember, the goal is to enhance gameplay, not hinder it. With these insights, you're well-equipped to integrate kill bricks that truly elevate your Roblox creations. What's your biggest gaming challenge when building in Roblox Studio? Comment below!
Learn how to create a basic Roblox kill brick using simple scripting. Discover how to customize damage types and amounts for varied gameplay. Understand best practices for placing kill bricks strategically in your game. Troubleshoot common issues and optimize your kill bricks for performance. Elevate your Roblox game development skills with practical, easy-to-follow steps.
35


How To Make A Kill Brick In Roblox Studio YouTube . How To Make A Kill Brick In Roblox YouTube . How To Make A Kill Brick In Roblox Studio Using Script YouTube Hqdefault . How To Make A Kill Brick In Roblox Studio YouTube . How To Make A Kill Brick In Roblox Studio 2026 YouTube



How To Create A Kill Brick Roblox Studio Tutorial YouTube . How To Make A KILL BRICK In Roblox Studio 2026 YouTube . How To Make A Simple Kill Brick In Roblox Studio YouTube . How To Make A Kill Brick In Roblox Studio YouTube Hqdefault . HOW TO MAKE A KILL BRICK Roblox Studio Tutorial YouTube



How To Make A Kill Brick Roblox YouTube . How To Make A Kill Brick In Roblox Studio Working YouTube . How To Make A KILL BRICK In Roblox Studio Roblox Studio Tutorial . How To Make Kill Bricks In Roblox Studio YouTube . How To Make A Kill Brick In Roblox Studio YouTube


How To Make Kill Brick In Roblox Studio YouTube . How To Make A Working Kill Brick In Roblox Studio YouTube . How To Make A Kill Brick In Roblox Studio YouTube . How To Make A KILL Brick In Roblox Studio YouTube . How To Make A Kill Brick In Roblox YouTube


How To Make A Kill Brick Block In Roblox Studio YouTube . HOW TO MAKE KILL BRICK Roblox Studio Tutorial YouTube Hqdefault . How To Make A Kill Brick In Roblox Studio For Beginners YouTube Hqdefault . NEW How To Make A Kill Brick In Roblox Studio In 2026 YouTube . How To Make A Kill Brick In Roblox Studio YouTube



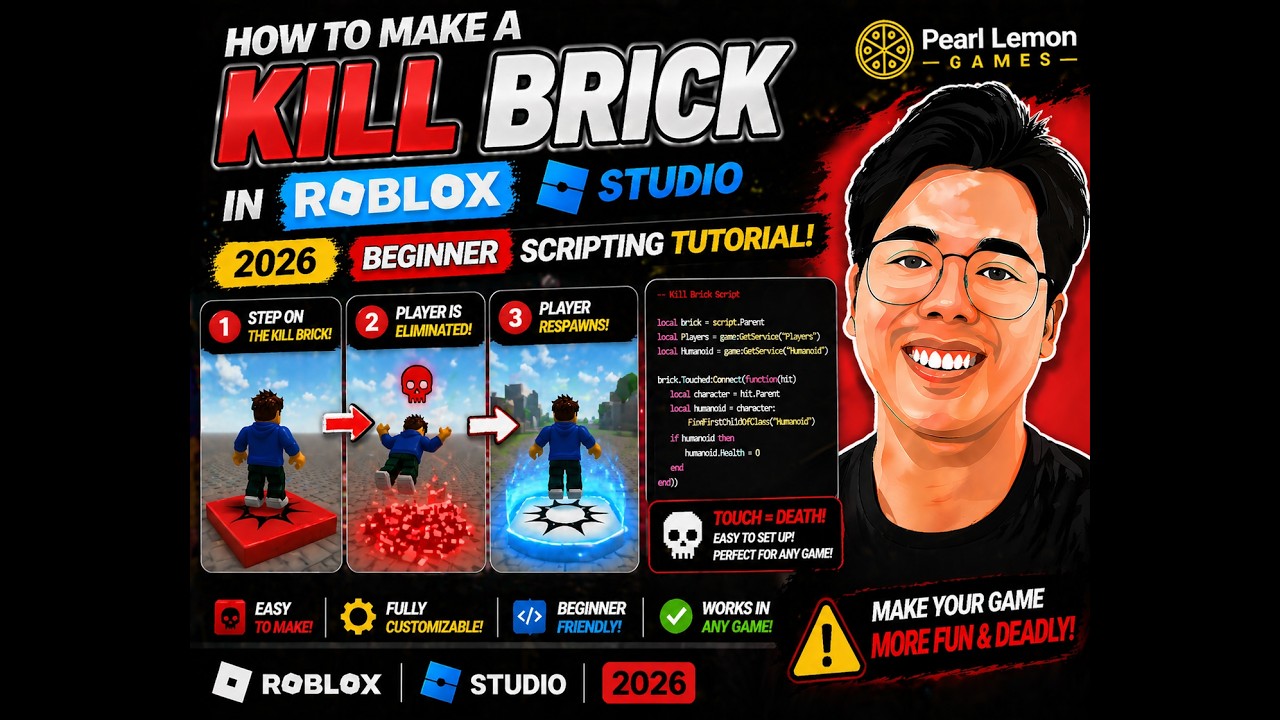
How To Make A Kill Brick In ROBLOX STUDIO 2024 YouTube Hqdefault . How To Make Kill Bricks In Roblox Studio YouTube . How To Make A Kill Brick In Roblox Studio Easy Tutorial For Hqdefault . How To Make Kill Brick Brick That Kills You Lava In Roblox Studio . How To Make A Kill Brick In Roblox Studio 2026 Beginner Roblox



EASY HOW TO MAKE A KILL BRICK IN ROBLOX STUDIO YouTube . How To Make A Kill Brick Roblox Studio YouTube Hqdefault . How To Make A Kill Brick A Roblox Studio Tutorial YouTube . How To Make A Kill Brick In Roblox Studio YouTube Hqdefault . How To Make A Kill Brick In Roblox Studio YouTube